How to extract public id from a Cloudinary URL easily
In this post, we will learn how to extract the public id from a Cloudinary delivery URL and build a new URL with the desired transformations using the cloudinary-build-url package.
Table of Content
- Table of Content
- Pre-requisites
- Understanding the Cloudinary delivery URL
- Extracting the public ID and build the URL
- Summary
Pre-requisites
Cloudinary is an end-to-end service offering image and video management, such as storage, run-time manipulation, and fast delivery as a CDN with optimization.
You need to get yourself a FREE Cloudinary account and upload your images to Cloudinary or any data storage you choose. We assume the images are already uploaded to Cloudinary for this post.
Next, let's understand how the Cloudinary URL works.
Understanding the Cloudinary delivery URL
Before creating our image variants, let's look at the Cloudinary delivery URL format.

In which:
cloud-nameis your Cloudinary's cloud name, which you can find in the Dashboard or the Settings page of the Cloudinary app.

transformations- a string of manipulation options (without space) to generate the desired version based on Cloudinary standards.version- auto-generated version for cache purposes from Cloudinary,path-to-image- or public id, the unique path of an image stored in Cloudinary, or the URL of an image stored in external sources (S3, for instance).
To make it easier to understand, we look at the below example:
https://res.cloudinary.com/example_cloud/image/upload/w_100,h_100,c_thumb,r_max/v1/examples/avatar.png
In the above URL, we have:
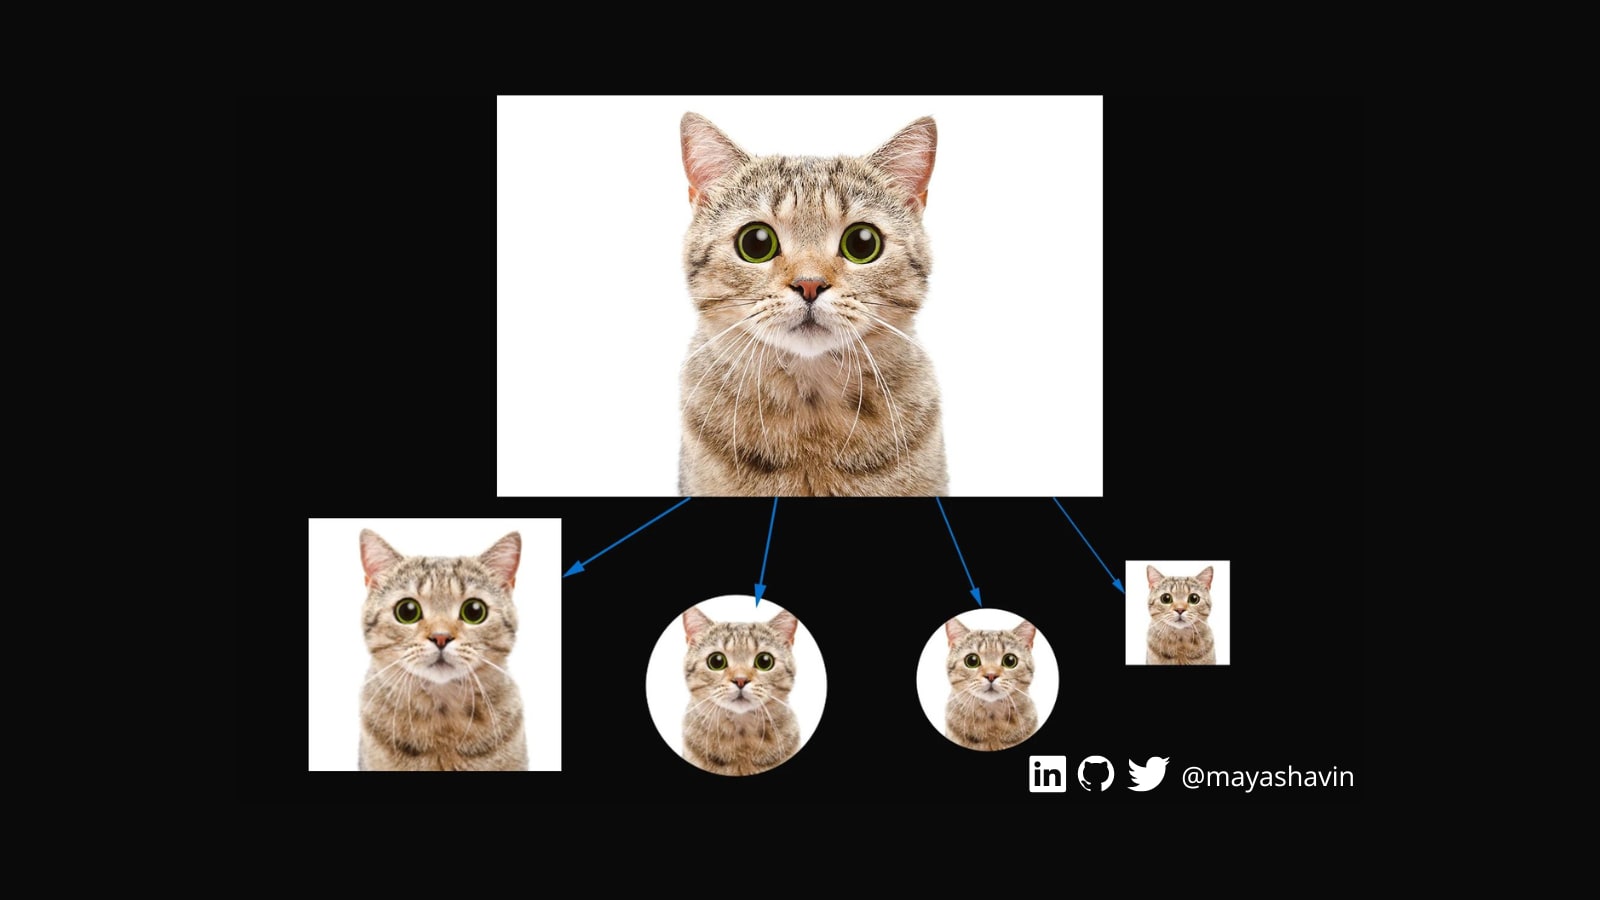
example_cloud- the cloud nameimage- the resource typeupload- indicates that the image is stored in Cloudinary. If the image is from an external source, the value will befetch.w_100,h_100,c_thumb,r_max- the transformations of 100x100 pixels in size, cropped as a thumbnail with auto face detection, and border-radius at maximum for a round shape.v1- the version of the imageexamples/avatar- the public id of the image
From here, you can directly modify the URL to get the desired transformation parameters manually or programmatically with the available official SDKs and tools.
However, for any SDK and tool, we still need to know and pass the public id of the image. Unfortunately, Cloudinary doesn't offer a straightforward way to get the public id from the console or its SDKs.
And that's what we are going to do next.
Extracting the public ID and build the URL
To extract the public id from the Cloudinary delivery URL, we will first install the cloudinary-build-url package using the command below:
yarn add cloudinary-build-url
Then in our JavaScript file useCloudinary.js, we can import the extractPublicId method from the package and use it to extract the public id from the URL:
import { extractPublicId } from 'cloudinary-build-url'

const publicId = extractPublicId(
  'https://res.cloudinary.com/example_cloud/image/upload/w_100,h_100,c_thumb,r_max/v1/examples/avatar.png'
)
The above code will return the public id examples/avatar as a string. You then can pass this public id to the buildUrl method from the same package to build the URL with the desired transformations, such as 500x500 pixels size and with a grayscale effect.
import { extractPublicId, buildUrl } from 'cloudinary-build-url'

const publicId = extractPublicId(
  'https://res.cloudinary.com/example_cloud/image/upload/w_100,h_100,c_thumb,r_max/v1/examples/avatar.png'
)

const url = buildUrl(publicId, {
  cloud: {
    cloudName: 'example_cloud',
  },
  transformations: {
    resize: {
      type: 'scale',
      width: 500,
      height: 500,
    },
    effect: {
      name: 'grayscale',
    },
  },
})
The above function will return an URL as in the following format, ready for us to use in our application.
https://res.cloudinary.com/example_cloud/image/upload/w_500,h_500,c_scale,e_grayscale/examples/avatar
And that's it! We have successfully extracted the public id from a Cloudinary delivery URL and built a new URL with the desired transformations.
Summary
In this post, we have learned how to extract the public id from a Cloudinary delivery URL and build a new URL with the desired transformations using the cloudinary-build-url package. Cloudinary is an excellent tool to help us handle image needs in our application with minimum effort.
What's next? How about integrating it into your application and seeing how it works?
👉 Learn about Vue with my new book Learning Vue. The early release is available now!
👉 If you'd like to catch up with me sometimes, follow me on Twitter | Facebook | Threads.
Like this post or find it helpful? Share it 👇🏼 😉